Visual Studio C# का यूज करके Serial Communication से Arduino uno में लगी led को Control करेंगे इससे पहले हमने Processing के use से Led Control की और Android mobile से Bluetooth से Led control की ये सब basic Projects है इनके द्वारा हम Serial Communication को आसानी से समझ सकते है यदि आप Uc browser का use कर रहे है तो आप सही तरह read नहीं कर पाएंगे google chrome या अन्य किसी browser का use करें सबसे पहले हम window Form design करेंगे और फिर Arduino से led connect करके Arduino sketch upload करेंगें फिर window form application को start कर led control करेंगे इस project के पहले आपको अपने computer में visual c# या visual studio install करने होंगे material की list में नीचे दे रहा हूँ
Software And Hardware
- Visual studio or Visual c#
- Arduino IDE
- Arduino uno
- Led
Create New Project In Visual Studio
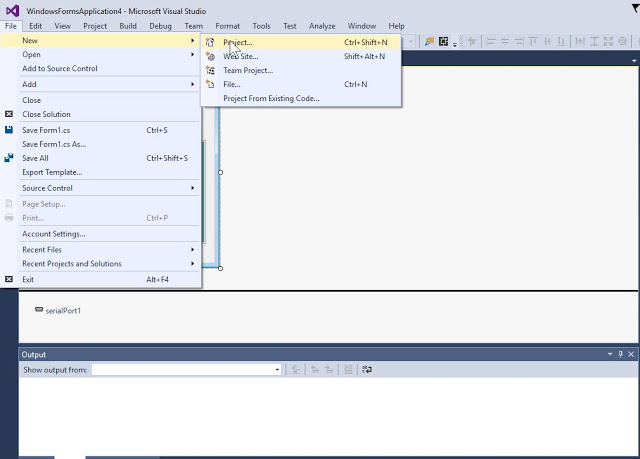
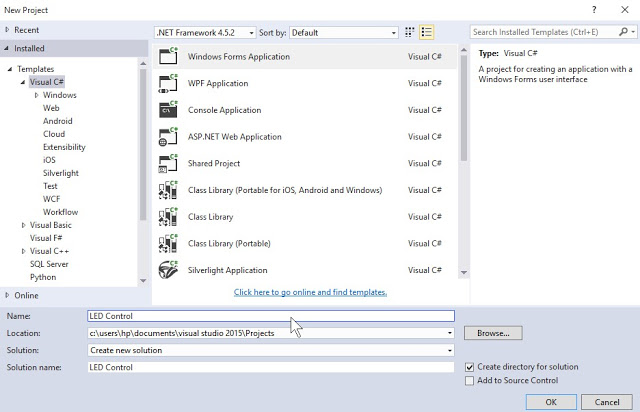
इसके लिए पहले Visual Studio को launch करें और new Project सेलेक्ट करें जैसा की स्क्रीन शॉट्स मैं है अब Visual C# में Window Form Application चुनें और Enter का press करें
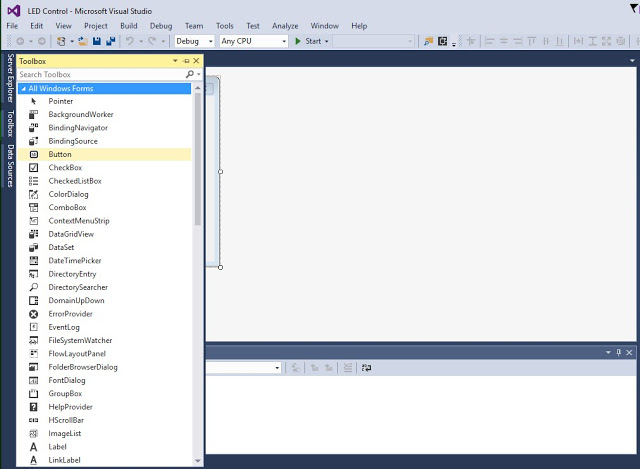
अब आपके सामने Form1.cs [Design] है जिसमे आपको button design करने है यानि की यह desine editor है इसे design करने के लिए आपको किसी तरह की Programming करने की जरूरत नहीं है Tool box जो left side में है इसी में से आपको User Interface के widgets को drag करके form पर Drop करना होता है
Add,Rename,change color Button
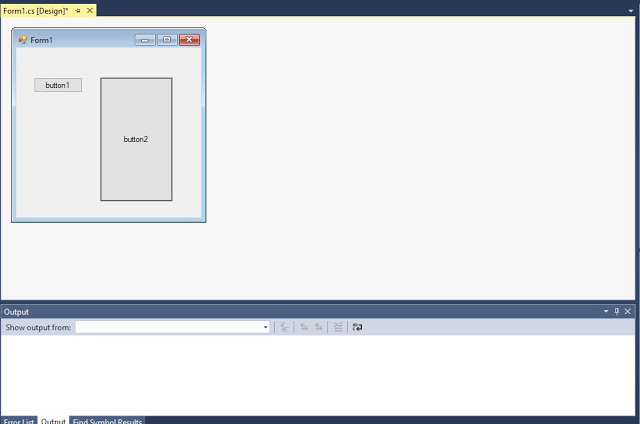
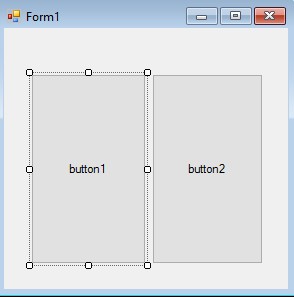
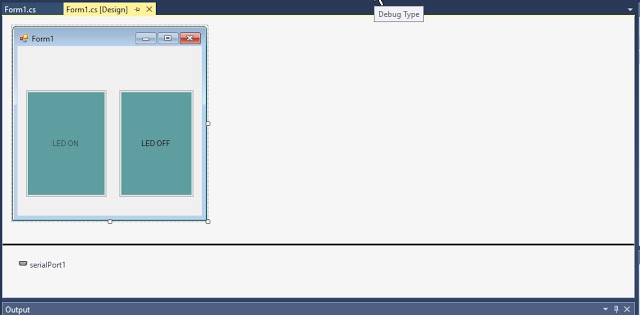
Tool box में से Button को darg करके Form पर drop करें हमें दो button design करने है एक On के लिए और एक Off के लिए अब दोनों Buttons को resize करें अपने अनुशार size रखें
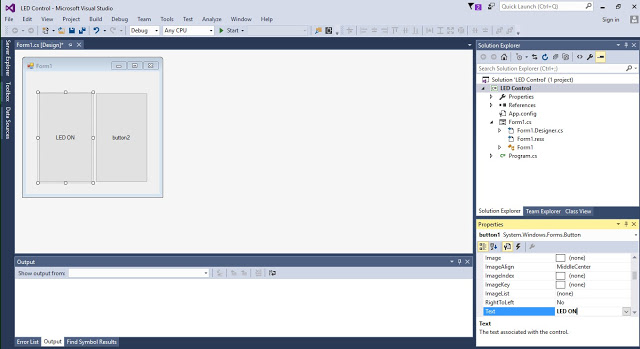
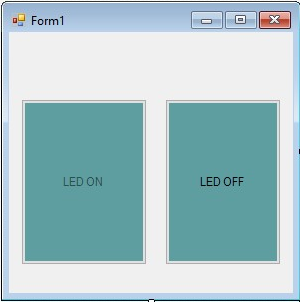
अब Button1 और Button2 जो इन buttons के नाम है उनको change करके Led on और Led off दे इसके लिए right click करे और Property में Text change करें इसके लिए नीचे का screen shot में Right side में देखें मेने Button1 से LED On किया और Enter key press की
Import Serial Port
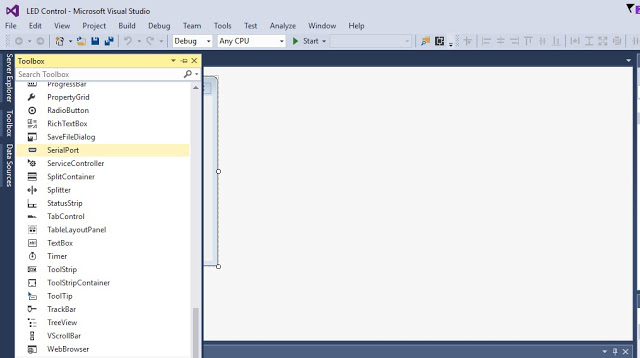
अब हमें Serial Port हमारे Form में Import करना है इसके लिए Tool box में Serial port search करें और उसे Drag करके Form में Drop करें
Button rename करके अब Button का color भी property में जाकर change करें
Button और SerialPort1 हमने Window form में Use कर लिए है अब Serial port के जरिये हम Arduino uno से कैसे Communicate करेंगें यानि की Button को Press करने पर Arduino uno को Text या number कैसे send होगा हमे Button Led on को press करने पर Arduino को Text “Led on” send करना है और इस प्रकार Button Led off को Press करने पर text “Led off” send करना है जिससे Arduino uno से Connect हमारी Led on और off होगी
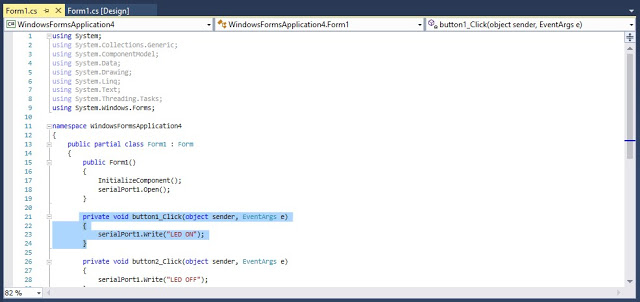
window form application में बने Buttons में से किसी पर भी double click करें जिससे नीचे Screenshot में दिख रही tab “Form1.cs” open होगी
इसमें पहले से जो Program लिखा होगा उसे ctrl+A press करके Select करें और Delete Button press करें अब नीचे Visual Studio c# Programming heading में लिखे program को copy करके Form1.cs में paste करें
Visual Studio C# Programming
using System;
using System.Collections.Generic;
using System.ComponentModel;
using System.Data;
using System.Drawing;
using System.Linq;
using System.Text;
using System.Threading.Tasks;
using System.Windows.Forms;
namespace WindowsFormsApplication4
{
public partial class Form1 : Form
{
public Form1()
{
InitializeComponent();
serialPort1.Open();
}
private void button1_Click(object sender, EventArgs e)
{
serialPort1.Write(“LED ON”);
}
private void button2_Click(object sender, EventArgs e)
{
serialPort1.Write(“LED OFF”);
}
}
}
हमारा Arduino uno को Control कर सकने बाला Window Application Form तैयार है अब Arduino से Led connect करें
Arduino Led Circuit and Programming
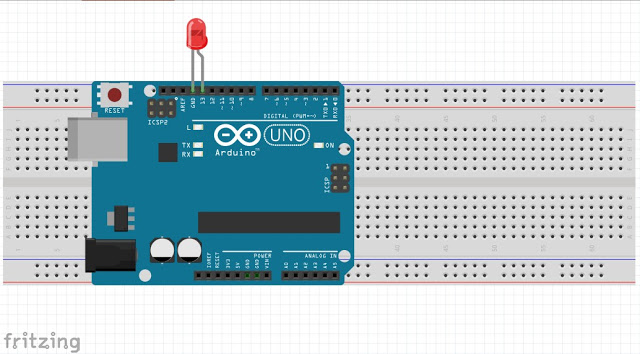
Arduino uno की pin 13 से led connect करें और Programming cable से इसे अपने Computer से Connect करें
Arduino IDE को launch करें इस Sketch को यहां से Copy कर Arduino IDE में paste करें और Sketch को Upload करें
int data;void setup() {
pinMode(13, OUTPUT);
Serial.begin(9600);
}
void loop() {
if(Serial.available()){
data=Serial.read();
if(data==’LED ON’){
digitalWrite(13, HIGH);
}
if(data==’LED OFF’){
digitalWrite(13, LOW);
}
}
}
Run and compile Window Form Application
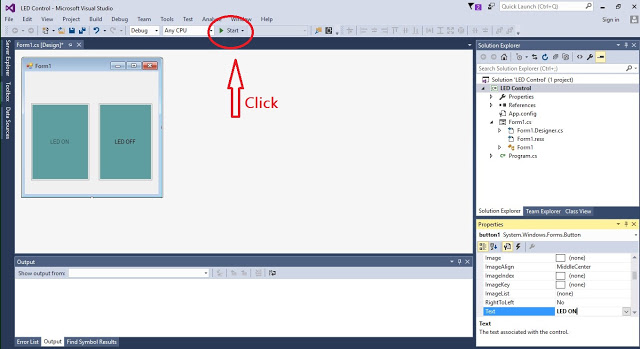
Arduino uno को Computer से Connect करके Visual Studio के application form को run करें इसके लिए Screenshot देखें और Start पर click करें
आपके सामने ऐसा ही form होगा यदि आपने सही तरह से सभी steps clear कर ली होंगी तो इन Visual c# में बने button को click करने पर आपके Arduino uno में लगी Led On Off होगी read करने के लिए thanks यह Project कैसा लगा comment कर के बता सकते है और कोई problem हो तो वो भी comment में बता सकते है इस Arduino और Visual studio के Project को facebook पर share जरूर करें इसके लिए share button नीचे है next project में visual studio से हम Voice recognition add करके Arduino को voice command से control करेंगे

![design in visual studio अब आपके सामने Form1.cs [Design] है जिसमे आपको button design करने है यानि की यह desine editor है](https://www.mechanic37.com/wp-content/uploads/2017/08/designform-1.jpg)
Leave a Reply